

How to Use LED Therapy Naturally for Youthful Skin Results
Finding a skincare method that truly fits your routine can sometimes feel like a struggle. Many British and Canadian women are searching for at-home solutions that deliver visible improvements without costly salon visits. For those dealing with acne, signs of ageing, or thinning hair, LED light therapy offers a non-invasive approach with the potential to enhance collagen production and calm inflammation. This guide walks you through the key preparation steps to help you get the best results from every session.
Table of Contents
- Step 1: Prepare Your Skin For Effective LED Therapy
- Step 2: Set Up The InfraLux Pro LED Facial Mask Correctly
- Step 3: Apply The Recommended LED Mode For Your Skin Concern
- Step 4: Complete Your LED Session Safely And Comfortably
- Step 5: Assess Your Results And Optimise Future Sessions
Quick Summary
| Important Insight | Explanation |
|---|---|
| 1. Prepare skin for LED therapy | Cleanse face thoroughly without products to enhance light absorption and treatment effectiveness. |
| 2. Choose the right LED mode | Match LED mode to skin concerns, such as using red for anti-aging and blue for acne. |
| 3. Track progress for best results | Document skin changes weekly to guide adjustments in the LED therapy approach. |
| 4. Complete sessions safely | After treatment, allow skin to rest before applying other products to avoid irritation. |
| 5. Consult a professional if needed | If results plateau after six weeks, seek expert advice for personalised treatment adjustments. |
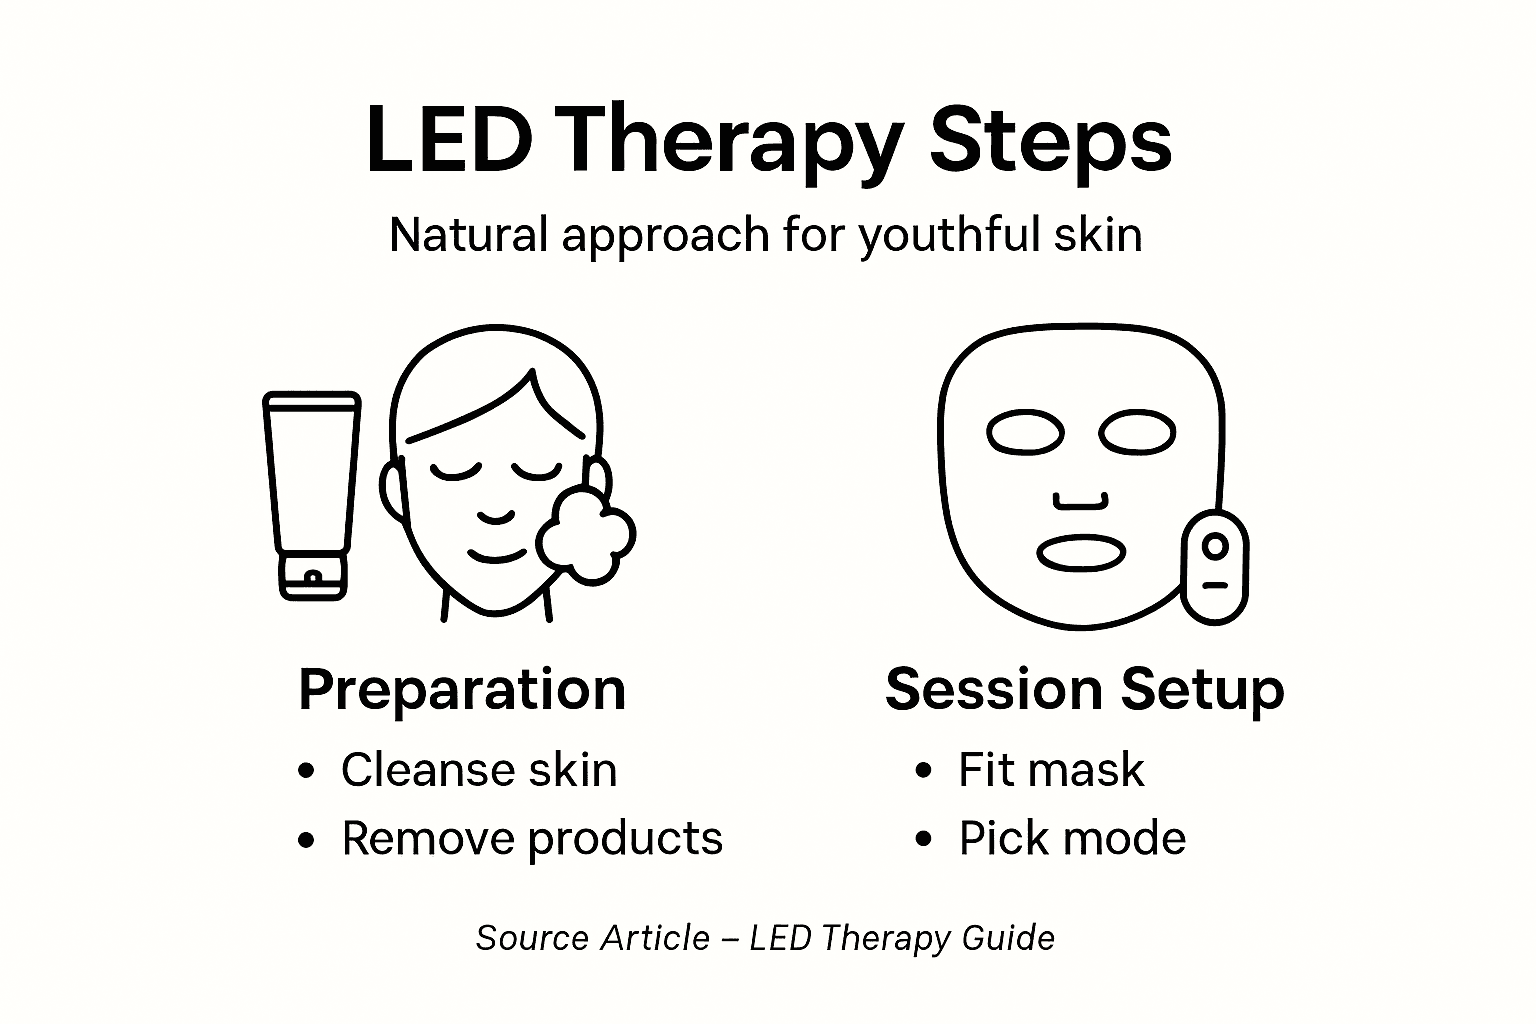
Step 1: Prepare your skin for effective LED therapy
Your skin needs proper preparation before LED therapy can work its magic. Think of it like preparing a canvas before painting—the cleaner and more receptive the surface, the better the results. Preparation ensures that light penetrates deeply into your skin, allowing the therapy to stimulate collagen production and reduce inflammation effectively.
Start by cleansing your face thoroughly with a gentle cleanser to remove makeup, oils, dirt, and impurities that build up throughout the day. Use lukewarm water and avoid harsh scrubbing, as you want to treat your skin kindly before the therapy session. Pat your skin dry gently with a soft towel, rather than rubbing, which can irritate the surface.
Once your skin is clean and dry, avoid applying topical products that might interfere with light absorption. This means skipping your serums, moisturisers, and oils for now. Wait until after your LED therapy session to apply these treatments, as they can create a barrier that blocks the beneficial wavelengths from reaching deeper skin layers.
Pay special attention to removing any photosensitising agents, including certain skincare ingredients and medications that increase light sensitivity. If you use retinoids, vitamin C, or acids in your routine, apply LED therapy on separate days or check with a skincare professional about timing. This simple step prevents discomfort and maximises your treatment effectiveness.
Your skin is now primed and ready for the light therapy to penetrate effectively and deliver maximum benefits. The clean, product-free canvas you’ve created allows the LEDs to work unobstructed, meaning you’ll see better results from each session.
Professional tip Prepare your skin 10 minutes before using your LED mask to allow any residual moisture to evaporate completely, which enhances light penetration and reduces the risk of any irritation.
Step 2: Set up the InfraLux Pro LED Facial Mask correctly
Proper setup of your InfraLux Pro mask ensures you get the most from every session whilst keeping your skin safe. Getting this right takes just a few minutes and makes a tremendous difference in your results. The mask is designed to be intuitive, but following the correct procedure maximises its effectiveness.
Start by positioning the mask comfortably against your face, ensuring it sits securely without pinching or causing pressure points. The InfraLux Pro features a lightweight, flexible design that should feel pleasant against your skin. Adjust the straps gently so the mask remains stable throughout your session without being too tight around your head or cheeks.
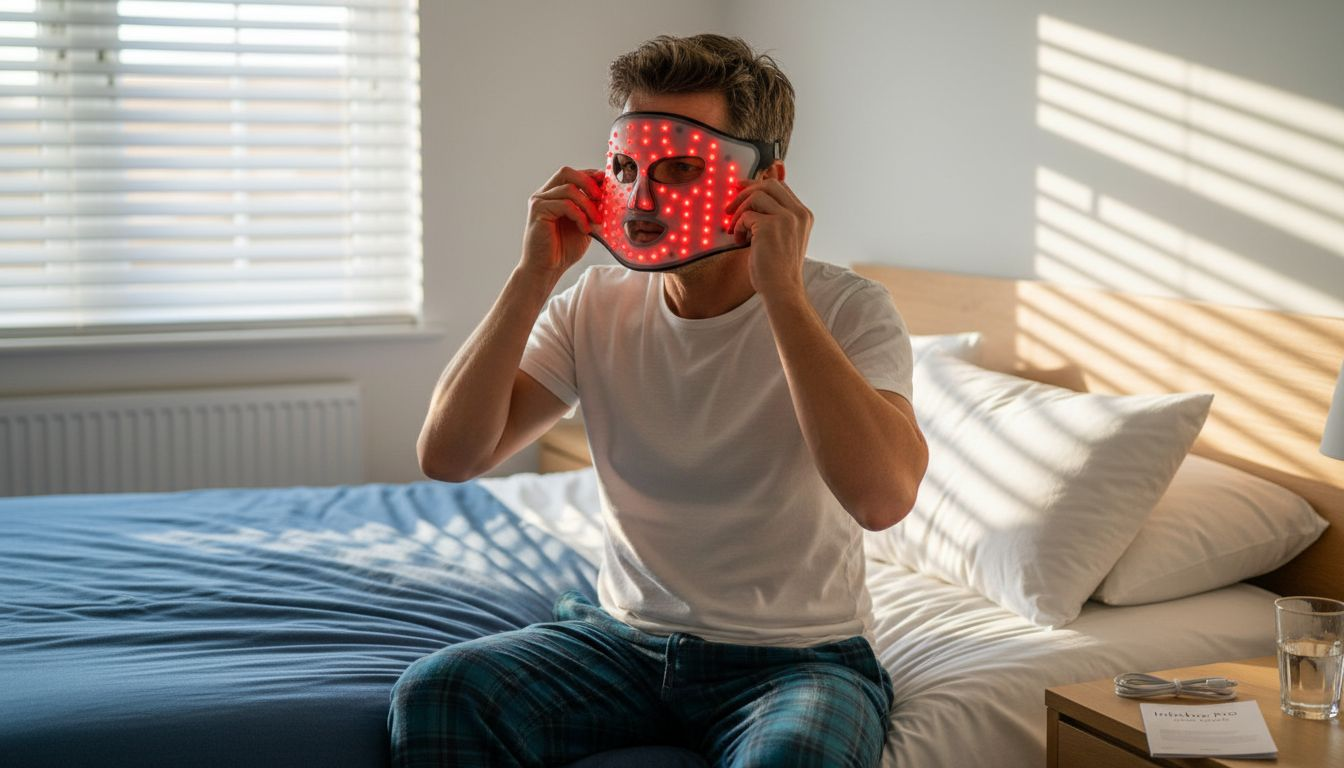
When you first begin using the device, start with shorter sessions at the lowest setting to allow your skin to acclimate to the treatment. Many users begin with just 10 minutes rather than the full recommended 15 to 20 minutes. This approach helps you gauge how your unique skin responds before gradually increasing both duration and intensity over subsequent sessions.
Select the appropriate LED colour mode based on your skin concerns. The InfraLux Pro offers four infrared modes tailored for specific benefits like collagen building, smoothness enhancement, and skin tone improvement. Red and infrared wavelengths work together to penetrate deeply, stimulating collagen production and reducing inflammation naturally.
Wear the mask in a comfortable position where you can relax completely. You might sit on your sofa, lie back on your bed, or settle into a comfortable chair. Since sessions last only 15 to 20 minutes, you can use this time to unwind, listen to a podcast, or simply enjoy some quiet moments.
Once you’ve finished your session, remove the mask gently and allow your skin to rest for a few minutes before applying your regular skincare routine. This brief pause helps your skin fully absorb the treatment benefits before you introduce other products.
Professional tip Keep your InfraLux Pro mask clean between uses by gently wiping the LED surface with a soft, dry cloth to maintain optimal light output and prevent any product buildup from affecting performance.
Step 3: Apply the recommended LED mode for your skin concern
Selecting the right LED mode is crucial because different wavelengths address different skin issues. The InfraLux Pro offers multiple infrared modes specifically designed to target your unique concerns. Matching the correct mode to your skin condition ensures you get maximum benefits from each therapy session.
If you’re focused on anti-aging and wrinkle reduction, red light is your best choice. Red light therapy stimulates collagen production and reduces inflammation, making it ideal for diminishing fine lines and restoring skin firmness. This wavelength penetrates deeply into the dermis, encouraging your skin to rebuild and regenerate naturally over time.
For acne-prone skin, blue light targets the bacteria responsible for breakouts and inflammation. If you struggle with mild to moderate acne, selecting the blue mode on your device will help clear congestion and prevent new spots from forming. Many users see noticeable improvements in their complexion within just a few sessions.
The InfraLux Pro’s four infrared modes allow you to customise your treatment based on what matters most to you right now. You might use collagen-building mode one week and switch to smoothness-enhancement mode the next, depending on your skin’s changing needs. This flexibility means you’re never locked into a single approach.
Combining different light wavelengths may address multiple issues simultaneously for enhanced results. If you have mixed concerns like both ageing and occasional breakouts, you can rotate between modes throughout the week. Pay attention to how your skin responds and adjust accordingly.
Start with the mode that addresses your primary concern first. Once you’ve seen solid results over several weeks, you can experiment with other modes to refine your routine further. Your skin will guide you toward the combination that works best.
Here’s a compact reference on LED light modes and their benefits:
| LED Light Mode | Primary Target | Typical Benefits | Suggested Session Duration |
|---|---|---|---|
| Red | Ageing skin | Collagen boost, firmness | 15–20 minutes |
| Infrared | Sensitive skin | Reduces inflammation, soothes | 15–20 minutes |
| Blue | Acne-prone skin | Reduces bacteria, clears skin | 10–15 minutes |
| Mixed (Red+Blue) | Combined concerns | Anti-ageing and anti-acne | Alternate sessions |
Professional tip If you have sensitive skin or are new to LED therapy, begin with the gentlest infrared mode and the lowest intensity setting, then gradually progress to stronger modes as your skin builds tolerance over two to three weeks.
Step 4: Complete your LED session safely and comfortably
Finishing your LED therapy session correctly is just as important as starting it properly. These final moments determine your comfort level and help your skin get the most benefit from the treatment. A mindful conclusion sets you up for consistent use and better long-term results.
As your 15 to 20 minute session winds down, allow yourself to relax completely in your comfortable position. Your body temperature may have risen slightly under the mask, which is completely normal. Sit quietly for another minute or two as the device completes its final cycle before you remove it.
When the session ends, remove the InfraLux Pro mask gently and slowly. Your skin may feel slightly warm or appear lightly flushed, which indicates the therapy is working. Avoid rubbing your face or applying pressure immediately after removal, as your skin is in a heightened state of sensitivity right now.
Practise avoiding light-sensitive skincare products immediately after treatment to protect your skin. This means waiting at least 10 to 15 minutes before applying serums, oils, or active ingredients. Your skin has just received powerful stimulation, and introducing additional actives too quickly could overwhelm it.
Hydration is your friend after LED therapy. Drink a glass of water and consider applying a gentle, hydrating moisturiser to lock in the benefits. Your skin has been stimulated to produce more collagen and repair itself, so nourishing it with moisture supports these natural processes beautifully.
If you experience any unusual redness, itching, or discomfort that doesn’t resolve within an hour, discontinue use and consult a healthcare provider. Most users experience no adverse effects, but your safety and comfort always come first. Listen to your skin and adjust your routine accordingly.
Professional tip After completing your session, apply a hydrating face mask or leave-on serum whilst your skin is still slightly warm, as the increased blood flow will help absorption and amplify the nourishing benefits.
Step 5: Assess your results and optimise future sessions
Tracking your progress transforms LED therapy from a guessing game into a science. Meaningful results require consistency and observation, so taking time to document changes helps you understand what works best for your skin. This assessment phase informs smarter decisions about your ongoing routine.
Start documenting your skin after your first week of sessions. Notice changes in skin texture, tone, clarity, and the appearance of fine lines or wrinkles. Take photos in consistent lighting and compare them weekly to spot improvements you might otherwise miss. Many users see the most dramatic changes after three to four weeks of regular use.
Assessing skin improvements after LED therapy requires consistency over multiple sessions and patient observation. If you’re targeting acne, note the number and severity of breakouts. For anti-ageing, pay attention to skin firmness, smoothness, and how your fine lines respond. Specific observations help you decide whether to continue your current approach or make adjustments.
Based on your documented results, you can optimise your future sessions strategically. If you’re seeing excellent results with your current mode and frequency, maintain that schedule. However, if progress has plateaued after several weeks, consider adjusting either the LED mode you’re using or increasing session frequency slightly. Small tweaks often reignite improvements.
Regular treatments and tracking skin responses help optimise results over time. Patience matters enormously here. Noticeable improvements typically take weeks to months, so resist the urge to make dramatic changes after just two or three sessions. Give each approach at least three to four weeks before deciding whether to modify anything.
Consider consulting with a skincare professional about your progress if you’ve been consistent for six weeks without seeing results. They can assess your skin directly and recommend personalised adjustments to your therapy routine. Professional guidance ensures you’re using the InfraLux Pro in ways that align with your unique skin needs and goals.
Professional tip Maintain a simple progress journal noting the date, LED mode used, session duration, and observable skin changes; this data becomes invaluable for identifying patterns and knowing exactly which treatments deliver your best results.
To help optimise your treatment routine, here is a table summarising progress assessment tips:
| Tracking Element | Why It’s Important | How to Implement |
|---|---|---|
| Weekly photographs | Monitors gradual improvements | Use same time and lighting |
| Skin feel/texture notes | Understand product effectiveness | Record after each session |
| Session log | Adjust regime for best outcomes | Note date, mode, duration |
| Professional review | Refines your approach if needed | Consult after 6 weeks if unsure |
Discover Effective LED Therapy Solutions for Youthful Skin Today
The journey to youthful skin as detailed in “How to Use LED Therapy Naturally for Youthful Skin Results” highlights common challenges such as wrinkles, inflammation, and acne. These skin concerns require precise care, including proper skin preparation and choosing the right LED wavelength to stimulate collagen and reduce bacteria. Many individuals struggle with inconsistent results or difficulty maintaining an effective home routine. Our advanced and clinically proven devices, like the PDT LED Collection at Lumilux, offer dermatologist-inspired technology designed to deliver safe, non-invasive skin rejuvenation in the comfort of your home.
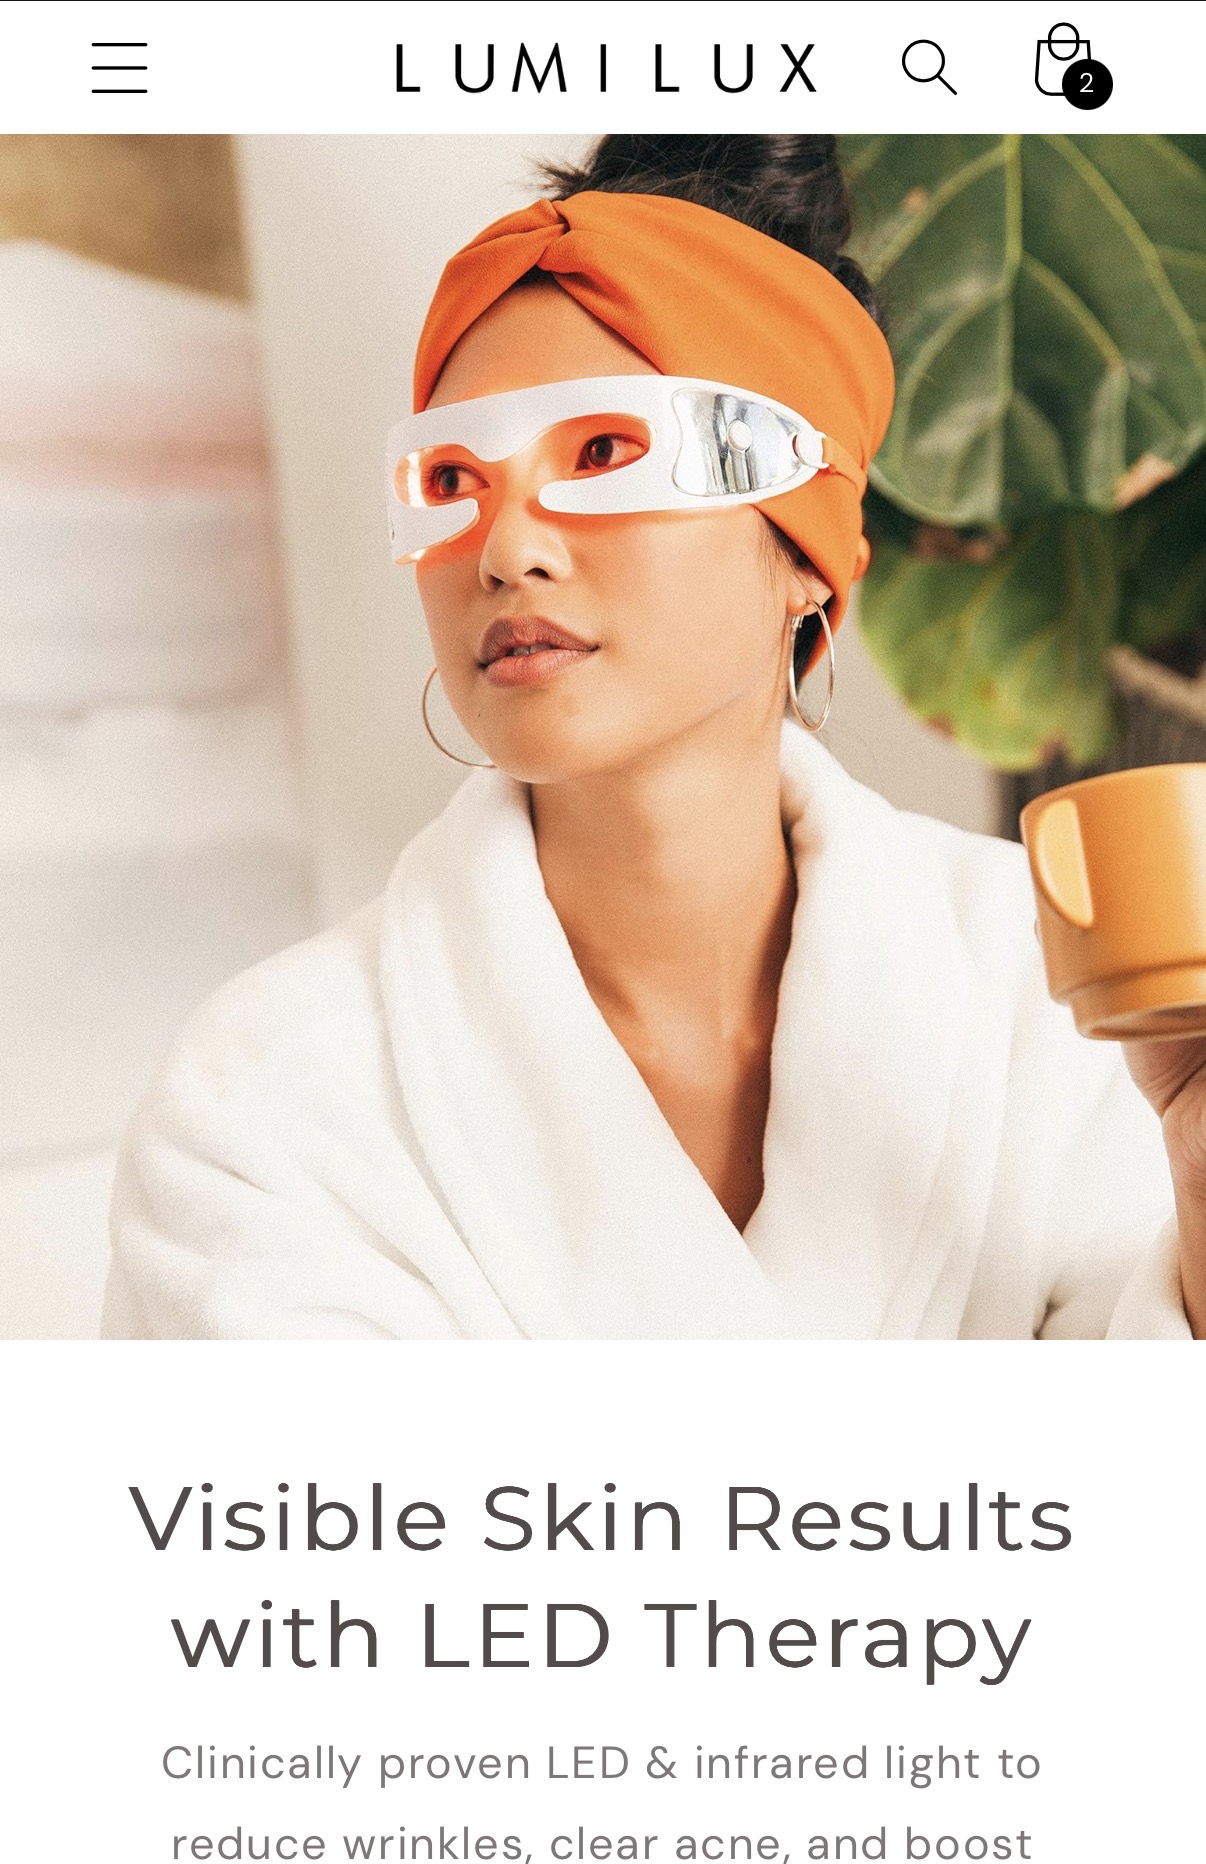
Experience the difference with cutting-edge LED facial masks that seamlessly fit into your self-care ritual. Act now to transform your skincare routine with expert-grade devices that focus on real results backed by science. Visit Lumilux to explore our range of targeted therapies and start your path to visibly radiant, firmer skin. Don’t wait to embrace youthful vitality and confidence.
Frequently Asked Questions
How do I prepare my skin for LED therapy?
To prepare your skin for LED therapy effectively, start by cleansing your face thoroughly with a gentle cleanser to remove dirt, oils, and makeup. Ensure your skin is clean and free from any topical products before the session to allow for maximum light absorption.
What is the ideal duration for an LED therapy session?
The ideal duration for each LED therapy session is typically between 15 to 20 minutes. Start with shorter sessions of around 10 minutes at the lowest setting to see how your skin responds before increasing the time gradually.
How can I select the right LED mode for my skin concerns?
Selecting the right LED mode involves identifying your primary skin concern. For anti-ageing benefits, use the red light mode, while the blue light mode is effective for acne concerns; switch between modes based on your skin’s changing needs for optimal results.
What should I do immediately after my LED therapy session?
After your LED therapy session, remove the mask gently and allow your skin to rest for a few minutes before applying any skincare products. Hydrate your skin by applying a gentle moisturiser to support the collagen production stimulated during the therapy.
How can I track my progress with LED therapy?
You can track your progress by documenting your skin’s texture, tone, and any changes in fine lines or wrinkles weekly. Consider taking consistent photographs under the same lighting to better observe improvements over time.
Recommended
- Harness the Power of LED Light Therapy for Youthful Skin - Lumilux
- Effective Blue Light Therapy for Skin Benefits - Lumilux
- The Science Behind LED Light Therapy for Radiant Skin - Lumilux
- Yellow LED Light Therapy: Transforming Skincare - Lumilux
- Complete Guide to Brightening Skincare Naturally – Didis Beauty Center