

Infrared Therapy Guide for At-Home Skin and Hair Results
Finding an effective at-home solution for aging skin or thinning hair often feels complicated, especially with countless devices on the market. For many adults across Europe, advanced LED and infrared therapy bring new hope, offering noninvasive options for skin rejuvenation and hair growth. By focusing on personalized assessment and the right technology, you can unlock lasting improvements in your wellness routine—without the guesswork.
Table of Contents
- Step 1: Assess Your Skin And Hair Care Needs
- Step 2: Choose Your Optimal Infrared Therapy Device
- Step 3: Prepare Your Skin Or Scalp For Treatment
- Step 4: Apply Infrared Therapy With Recommended Technique
- Step 5: Evaluate Your Results And Adjust Your Routine
Quick Overview
| Key Insight | Explanation |
|---|---|
| 1. Assess Your Skin and Hair Needs | Conduct a personal assessment to identify unique skin and hair conditions, guiding your infrared therapy decisions. |
| 2. Choose the Right Device | Select an infrared therapy device based on specific parameters like wavelength and FDA clearance to maximize effectiveness. |
| 3. Properly Prepare for Treatment | Cleanse your skin thoroughly and remove products to enhance light absorption during therapy sessions. |
| 4. Follow Recommended Application Techniques | Use the device at the correct distance and duration to ensure even treatment and effective results. |
| 5. Track Your Progress Meticulously | Document changes through photos and notes to evaluate treatment effectiveness and adjust your routine as needed. |
Step 1: Assess your skin and hair care needs
Before diving into infrared therapy, understanding your unique skin and hair requirements is crucial. Each person’s skin and hair health tells a unique story that demands personalized attention.
To effectively evaluate your current condition, start by conducting a comprehensive self-assessment focusing on key areas:
- Skin type (dry, oily, combination, sensitive)
- Specific skin concerns (aging, acne, uneven texture)
- Hair health status (thinning, breakage, scalp condition)
- Existing medical skin or hair conditions
Comprehensive research indicates that individual skin assessment impacts therapeutic choices. Understanding the nuanced differences in your skin and hair helps determine the most appropriate infrared therapy approach.
Your body’s unique characteristics will guide the most effective treatment strategy.
Additionally, consider external factors that might influence your skin and hair health. Examine your lifestyle, including stress levels, diet, sleep patterns, and environmental exposures. These elements significantly impact how your body responds to infrared treatments.
Documenting your observations is key. Take clear, well-lit photographs of your skin and hair from multiple angles. Track existing conditions, noting texture, color, and any specific areas of concern. This visual documentation provides a baseline for measuring future improvements.
Consulting with a dermatologist or trichologist can offer professional insights into potential infrared radiation effects, helping you make informed decisions about your therapy approach.
Pro tip: Create a detailed skin and hair journal tracking changes, taking weekly progress photos to objectively monitor your infrared therapy results.
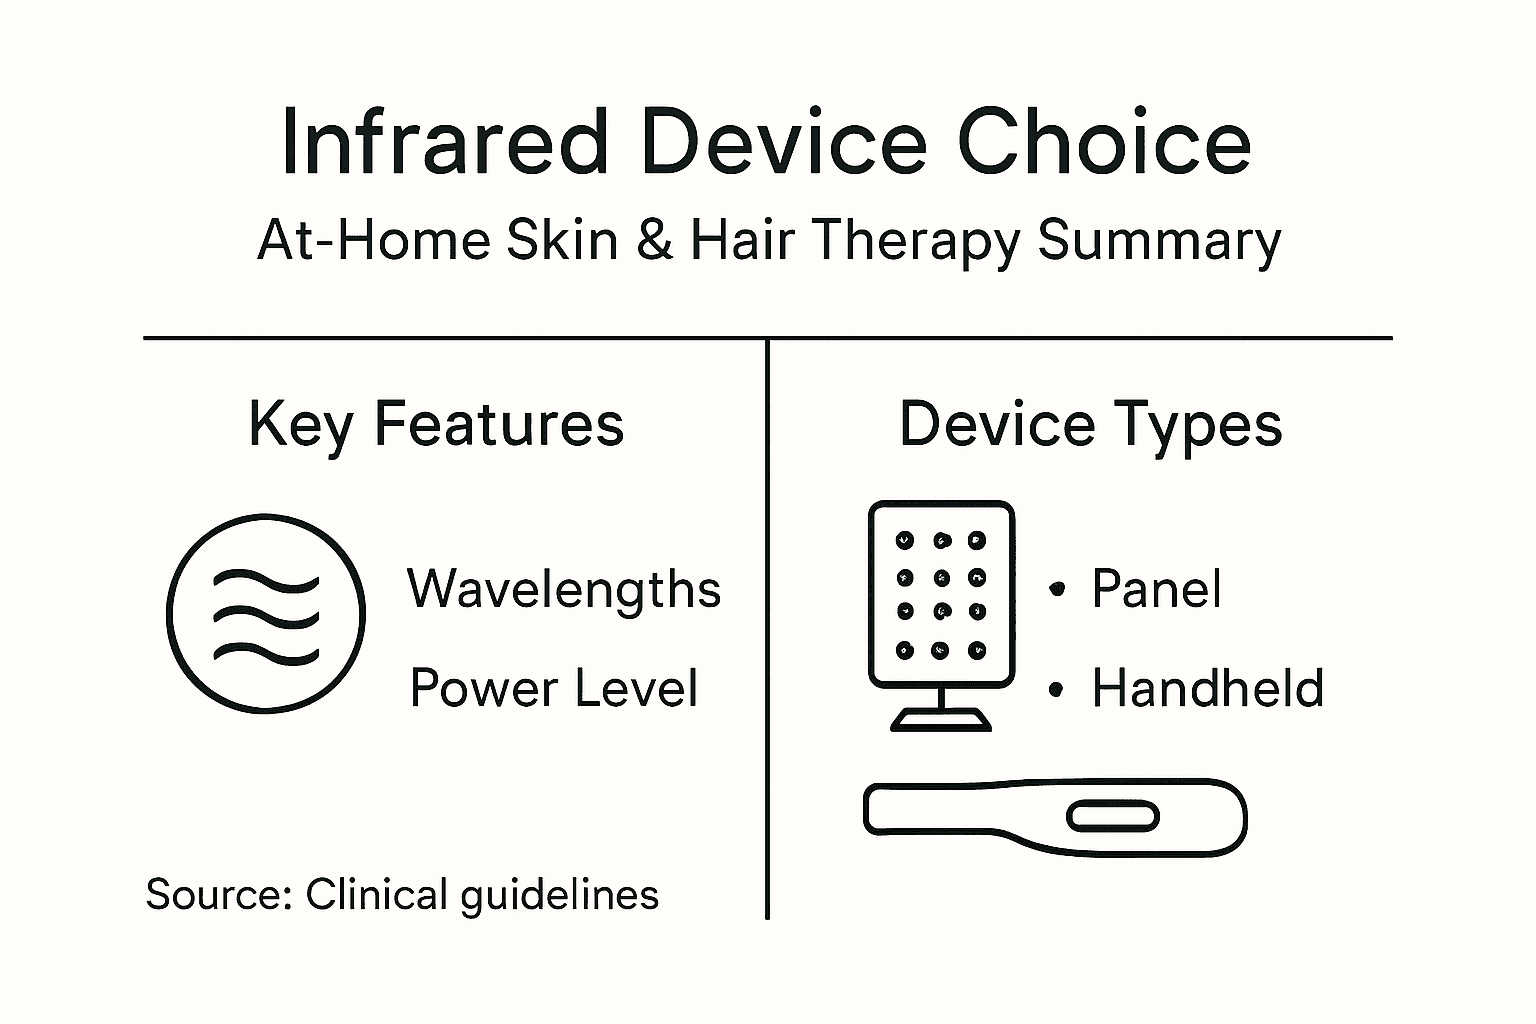
Step 2: Choose your optimal infrared therapy device
Selecting the right infrared therapy device is a critical step in achieving your skin and hair health goals. Not all devices are created equal, and finding the perfect match requires understanding key technical specifications and your personal wellness objectives.
When evaluating potential infrared therapy devices, focus on these essential criteria:
- Wavelength range: Look for devices offering near and far infrared wavelengths between 700nm and 1100nm
- Power output and intensity levels
- Treatment area coverage
- FDA clearance and clinical validation
- Ease of use and portability
The right device transforms your at-home wellness routine into a targeted therapeutic experience.
Research-backed device selection involves analyzing specific features that align with your health goals. Clinically developed LED devices with broader spectral ranges can optimize treatment outcomes for skin rejuvenation and hair growth.
Consider your primary objectives when comparing devices. Are you targeting skin aging, hair thinning, muscle recovery, or overall skin health? Different infrared devices specialize in specific therapeutic approaches, so matching device capabilities with your personal needs is crucial.
Additionally, examine the device’s build quality, warranty, and user reviews. Reputable manufacturers provide detailed specifications about wavelength penetration, treatment protocols, and expected results. Budget matters, but investing in a scientifically validated device trumps choosing the cheapest option.
Here is a quick reference comparing infrared therapy device types and their ideal application areas:
| Device Type | Best For | Typical Usage Location |
|---|---|---|
| Panel | Face, body, scalp | Home treatment area |
| Wand/Handheld | Spot treatments | Face, small body zones |
| Helmet/Cap | Hair regrowth | Scalp |
| Full-Body Pod | Overall wellness | Professional clinics |
Pro tip: Request manufacturer clinical studies and independent third-party testing results to validate the device’s performance claims before making your final purchase.
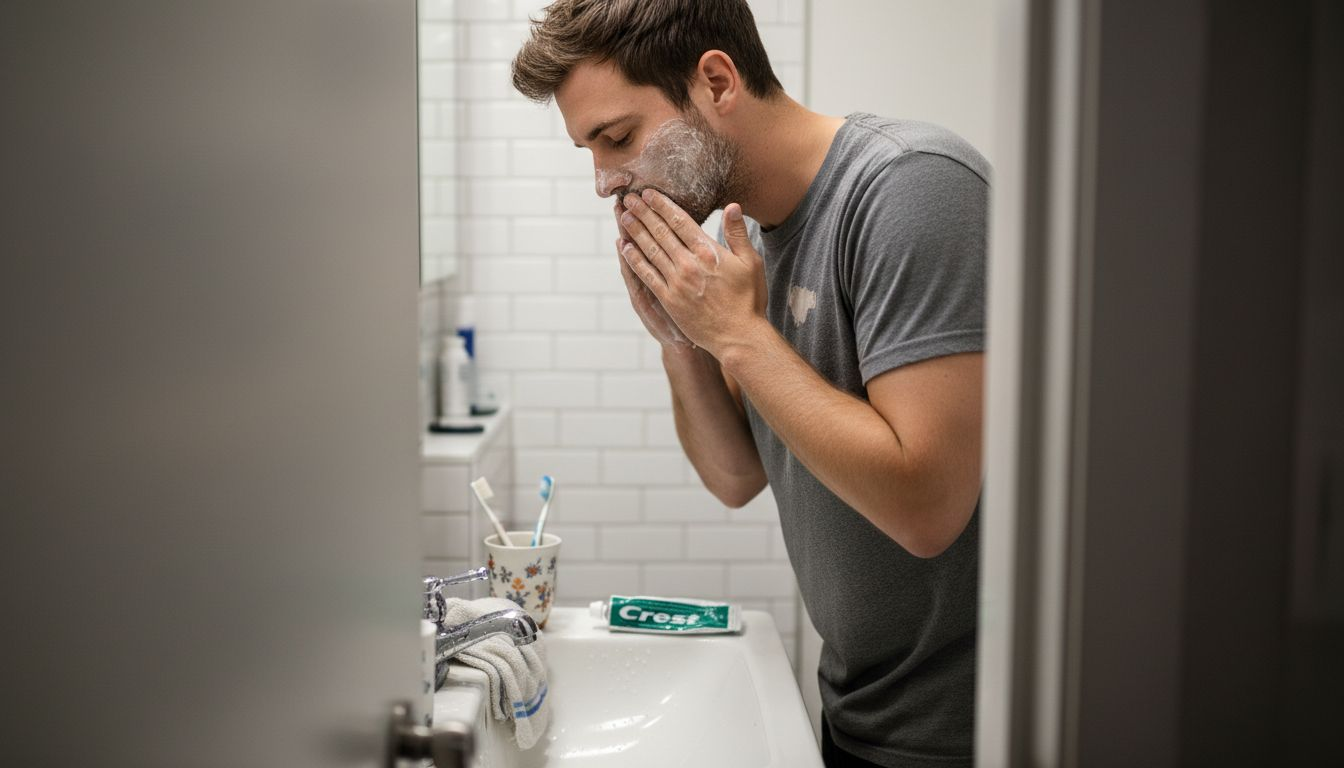
Step 3: Prepare your skin or scalp for treatment
Preparing your skin or scalp correctly is crucial for maximizing the effectiveness and safety of your infrared therapy session. The right preparation can significantly enhance your treatment results and minimize potential side effects.
Begin by following these essential preparation steps:
- Thoroughly cleanse the treatment area
- Remove all makeup, lotions, and skincare products
- Ensure proper device positioning by maintaining correct distance
- Wear protective eyewear
- Check skin for any active irritations or wounds
Proper preparation transforms your infrared therapy from a simple procedure to a targeted wellness experience.
Skin cleansing is paramount. Optimal skin preparation involves using a gentle, non-residual cleanser that removes dirt and oils without leaving a film that could block light penetration. Consider using micellar water or a mild facial cleanser specifically designed for sensitive skin.
Pay close attention to your skin’s condition before starting treatment. Individuals with photosensitivity, active skin conditions, or those taking medications that increase light sensitivity should consult a healthcare professional. Some medications can make your skin more vulnerable to light-based treatments, so professional guidance is crucial.
Establish a consistent treatment area that is clean, well-lit, and comfortable. Position your device at the recommended distance – typically 6-12 inches from your skin – to ensure optimal light absorption and prevent potential thermal discomfort.
Pro tip: Take clear, well-lit photographs of your skin before starting treatments to track subtle changes and improvements over time.
Step 4: Apply infrared therapy with recommended technique
Mastering the correct application technique is crucial for maximizing the potential benefits of your infrared therapy session. Understanding the precise method ensures you receive optimal results while maintaining safety and effectiveness.
Follow these key guidelines for successful infrared therapy application:
- Position device at recommended 6-12 inch distance
- Maintain consistent treatment duration
- Ensure even light coverage across treatment area
- Track treatment frequency and progression
- Monitor skin’s response during sessions
Precision in application transforms infrared therapy from a simple procedure to a targeted wellness intervention.
Treatment protocols matter significantly. Clinical studies recommend specific exposure patterns that vary depending on your specific skin or hair goals. For facial rejuvenation, aim for 30-minute sessions five times weekly over 12 weeks. Hair growth treatments might require daily 20-minute applications for up to 20 weeks.
Additionally, consider combining therapeutic approaches. Some advanced techniques involve integrating near-infrared light with complementary technologies like radiofrequency, which can enhance energy penetration and stimulate deeper cellular responses. This approach can potentially improve collagen regeneration and minimize potential side effects.
Start with shorter sessions and gradually increase duration as your skin adapts. Pay close attention to how your skin responds, watching for any signs of discomfort or unusual reactions. Consistency is key - maintain a regular treatment schedule for the best potential outcomes.
Pro tip: Use a timer or smartphone app to track your exact treatment duration and maintain precise, consistent therapy sessions.
Step 5: Evaluate your results and adjust your routine
Tracking and analyzing your infrared therapy progress is essential for optimizing your treatment outcomes. Understanding how to systematically assess your results will help you make informed decisions about continuing or modifying your therapy approach.
Implement these key evaluation strategies:
- Take detailed before and after photographs
- Track specific measurable changes
- Record treatment frequency and duration
- Note skin texture and appearance improvements
- Monitor any subtle changes in hair growth or skin condition
Your personal observations are the most powerful tool in assessing therapeutic effectiveness.
Comprehensive result tracking involves systematic clinical outcome measurement that goes beyond surface-level observations. Look for objective indicators like reduction in inflammation, improvements in skin texture, and changes in hair density.
Pay attention to both quantitative and qualitative changes. Some improvements might be subtle, such as increased skin elasticity or reduced fine lines, while others could be more dramatic like noticeable hair regrowth or reduced skin inflammation. Document these changes meticulously, as they will guide your future treatment decisions.
Be prepared to adjust your routine based on your body’s response. Not everyone experiences identical results, so flexibility is key. If you’re not seeing desired outcomes after 8-12 weeks, consider consulting with a skincare professional who can provide personalized guidance on modifying your infrared therapy approach.
Pro tip: Create a digital spreadsheet to track your treatment details, taking weekly progress photos with consistent lighting and angles to objectively document your transformation.
For an organized evaluation, compare these ways to track your infrared therapy progress:
| Method | Advantage | Limitation |
|---|---|---|
| Weekly photographs | Visual changes captured | Lighting differences |
| Symptom checklist | Tracks specific issues | Less visual context |
| Digital spreadsheet | Detailed record keeping | Requires consistency |
| Professional review | Expert assessment | Cost and scheduling |
Unlock Your Best Skin and Hair Health with Professional-Grade Infrared Therapy at Home
If you are seeking effective and safe ways to address skin aging, hair thinning, or uneven texture, understanding the intricacies of infrared therapy is only the first step. The real breakthrough happens when you use clinically proven, dermatologist-inspired devices designed to optimize treatment outcomes through precise wavelengths and advanced technology. Whether your goal is wrinkle reduction, inflammation relief, or stimulating hair regrowth, selecting the right tools informed by expert engineering is essential.
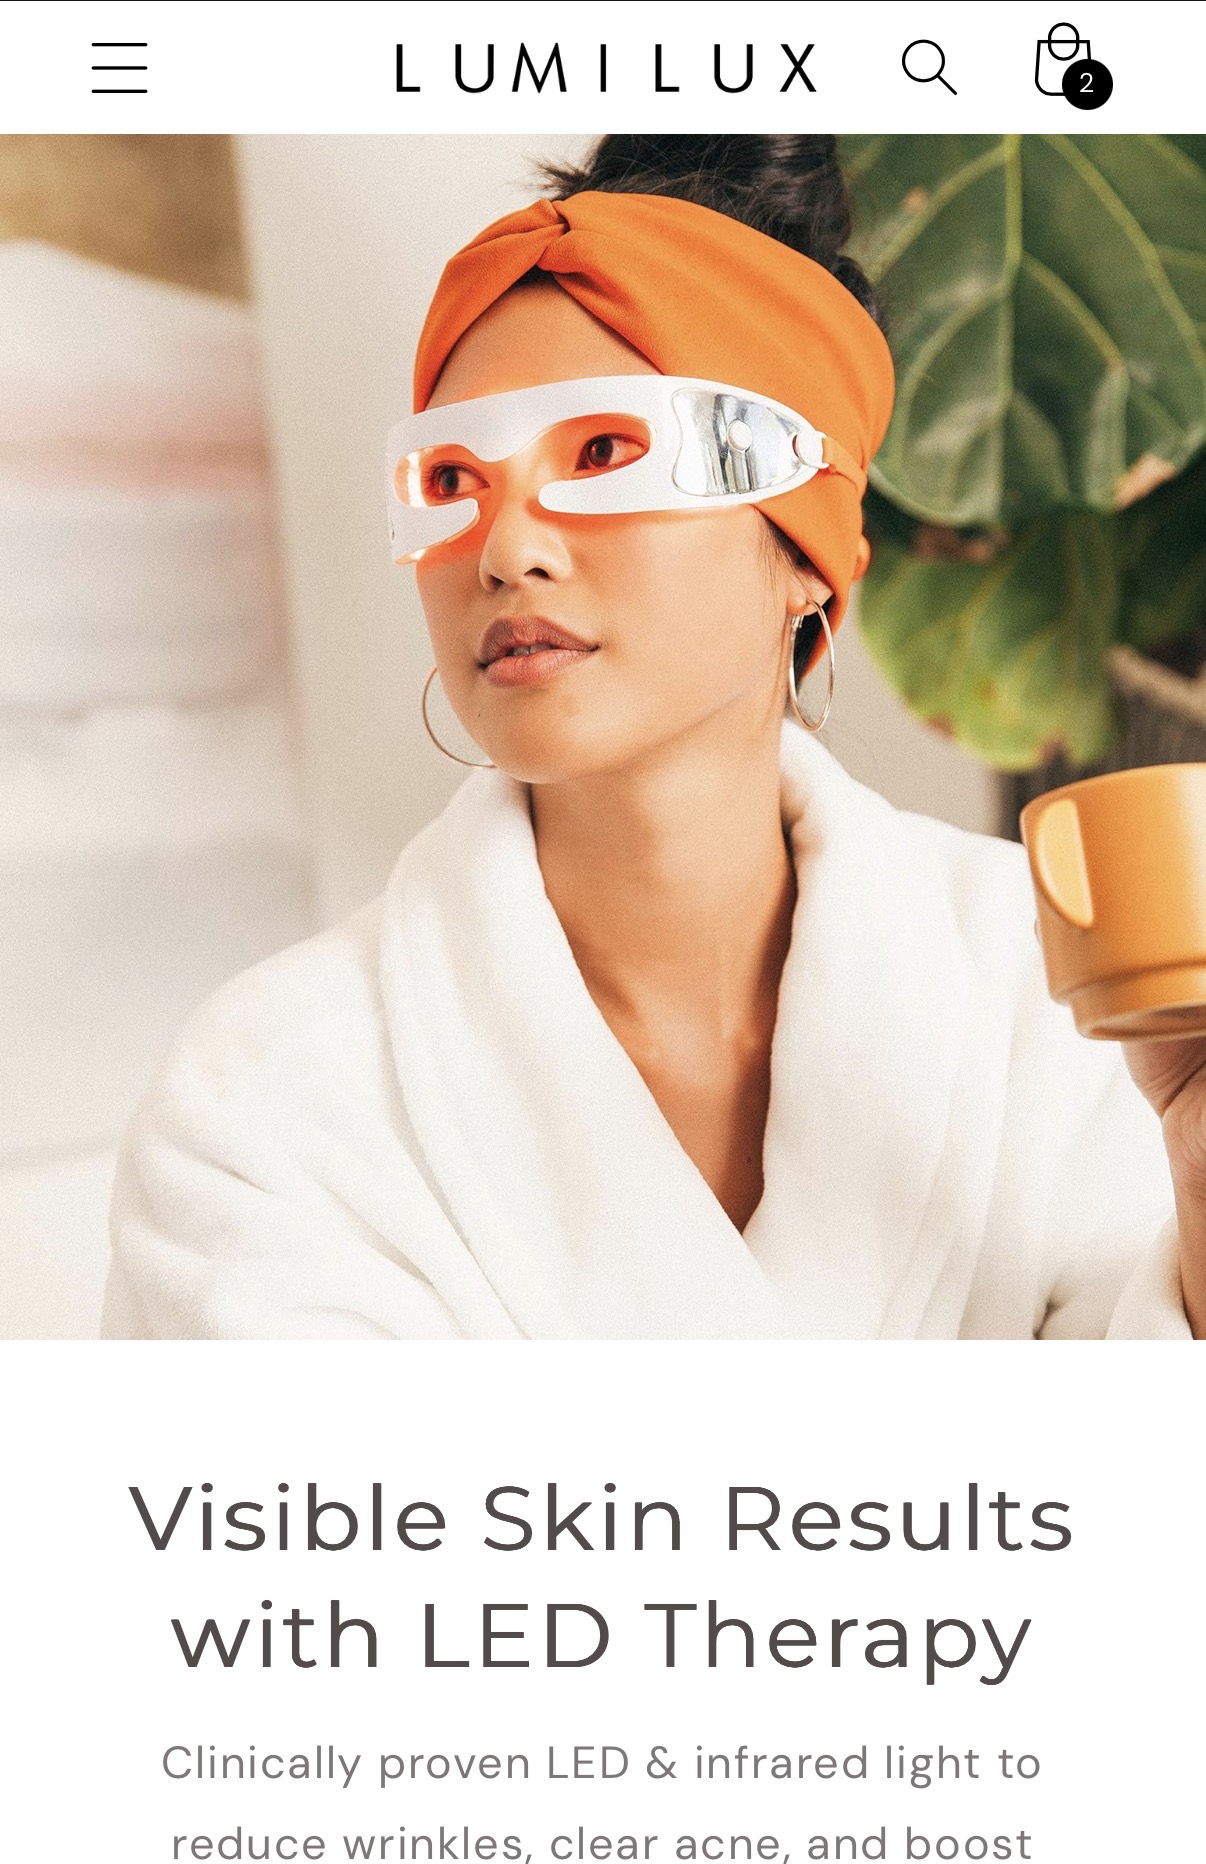
Explore our range of CE-certified PDT LED devices tailored for targeted skin rejuvenation and massagers engineered to enhance scalp circulation and maximize infrared light absorption. At Lumilux Limited, we provide innovative solutions that empower you to take control of your personal wellness journey with confidence. Start your infrared therapy regimen today with professional-grade equipment and witness visible, lasting results without leaving your home.
Frequently Asked Questions
What should I assess before starting infrared therapy for skin and hair?
Before starting infrared therapy, evaluate your skin and hair needs by identifying your skin type, specific concerns, and current hair health. Document these observations, including taking clear photographs, to establish a baseline and track improvements over time.
How do I choose the right infrared therapy device for at-home use?
To select an optimal infrared therapy device, focus on wavelength range, power output, treatment coverage, and ease of use. Compare devices that offer near and far infrared wavelengths between 700nm and 1100nm that align with your specific skin and hair goals, ensuring you invest in a scientifically validated product.
What preparation do I need to perform on my skin or scalp before infrared therapy?
Properly prepare your skin or scalp by thoroughly cleansing the treatment area and removing all products. Make sure to maintain the recommended distance from the device, wear protective eyewear, and check your skin for any irritations or wounds prior to beginning therapy sessions.
What is the recommended technique for applying infrared therapy?
Position your infrared device 6-12 inches away from the treatment area and maintain consistent treatment durations that align with your goals. For effective results, ensure even coverage and track your treatment frequency, gradually increasing session lengths as your skin adapts.
How can I evaluate my results from infrared therapy?
Evaluate your infrared therapy results by documenting before and after photographs, recording specific changes in your skin or hair, and noting improvements in texture or appearance. Create a digital spreadsheet to track treatment details and consider consulting a skincare professional if you don’t see desired results within 8-12 weeks.
How often should I perform infrared therapy sessions for the best results?
The frequency of infrared therapy sessions depends on your goals. For skin rejuvenation, aim for 30-minute sessions five times weekly, while hair growth treatments might require daily 20-minute sessions for optimal results over several weeks.